The Loft Editor
Add and position profiles along the axis, duplicate them, and set the hull, cap and shell options.
The loft editor is a 3D view for arranging the profiles of a loft. Select a loft and click Edit Loft in the Value References panel to open it. The editor fills the viewport and shows the rest of your model dimmed behind the loft.
The camera works as in the main 3D view. Left-drag orbits, middle-drag pans, and right-drag or the mouse wheel zooms.
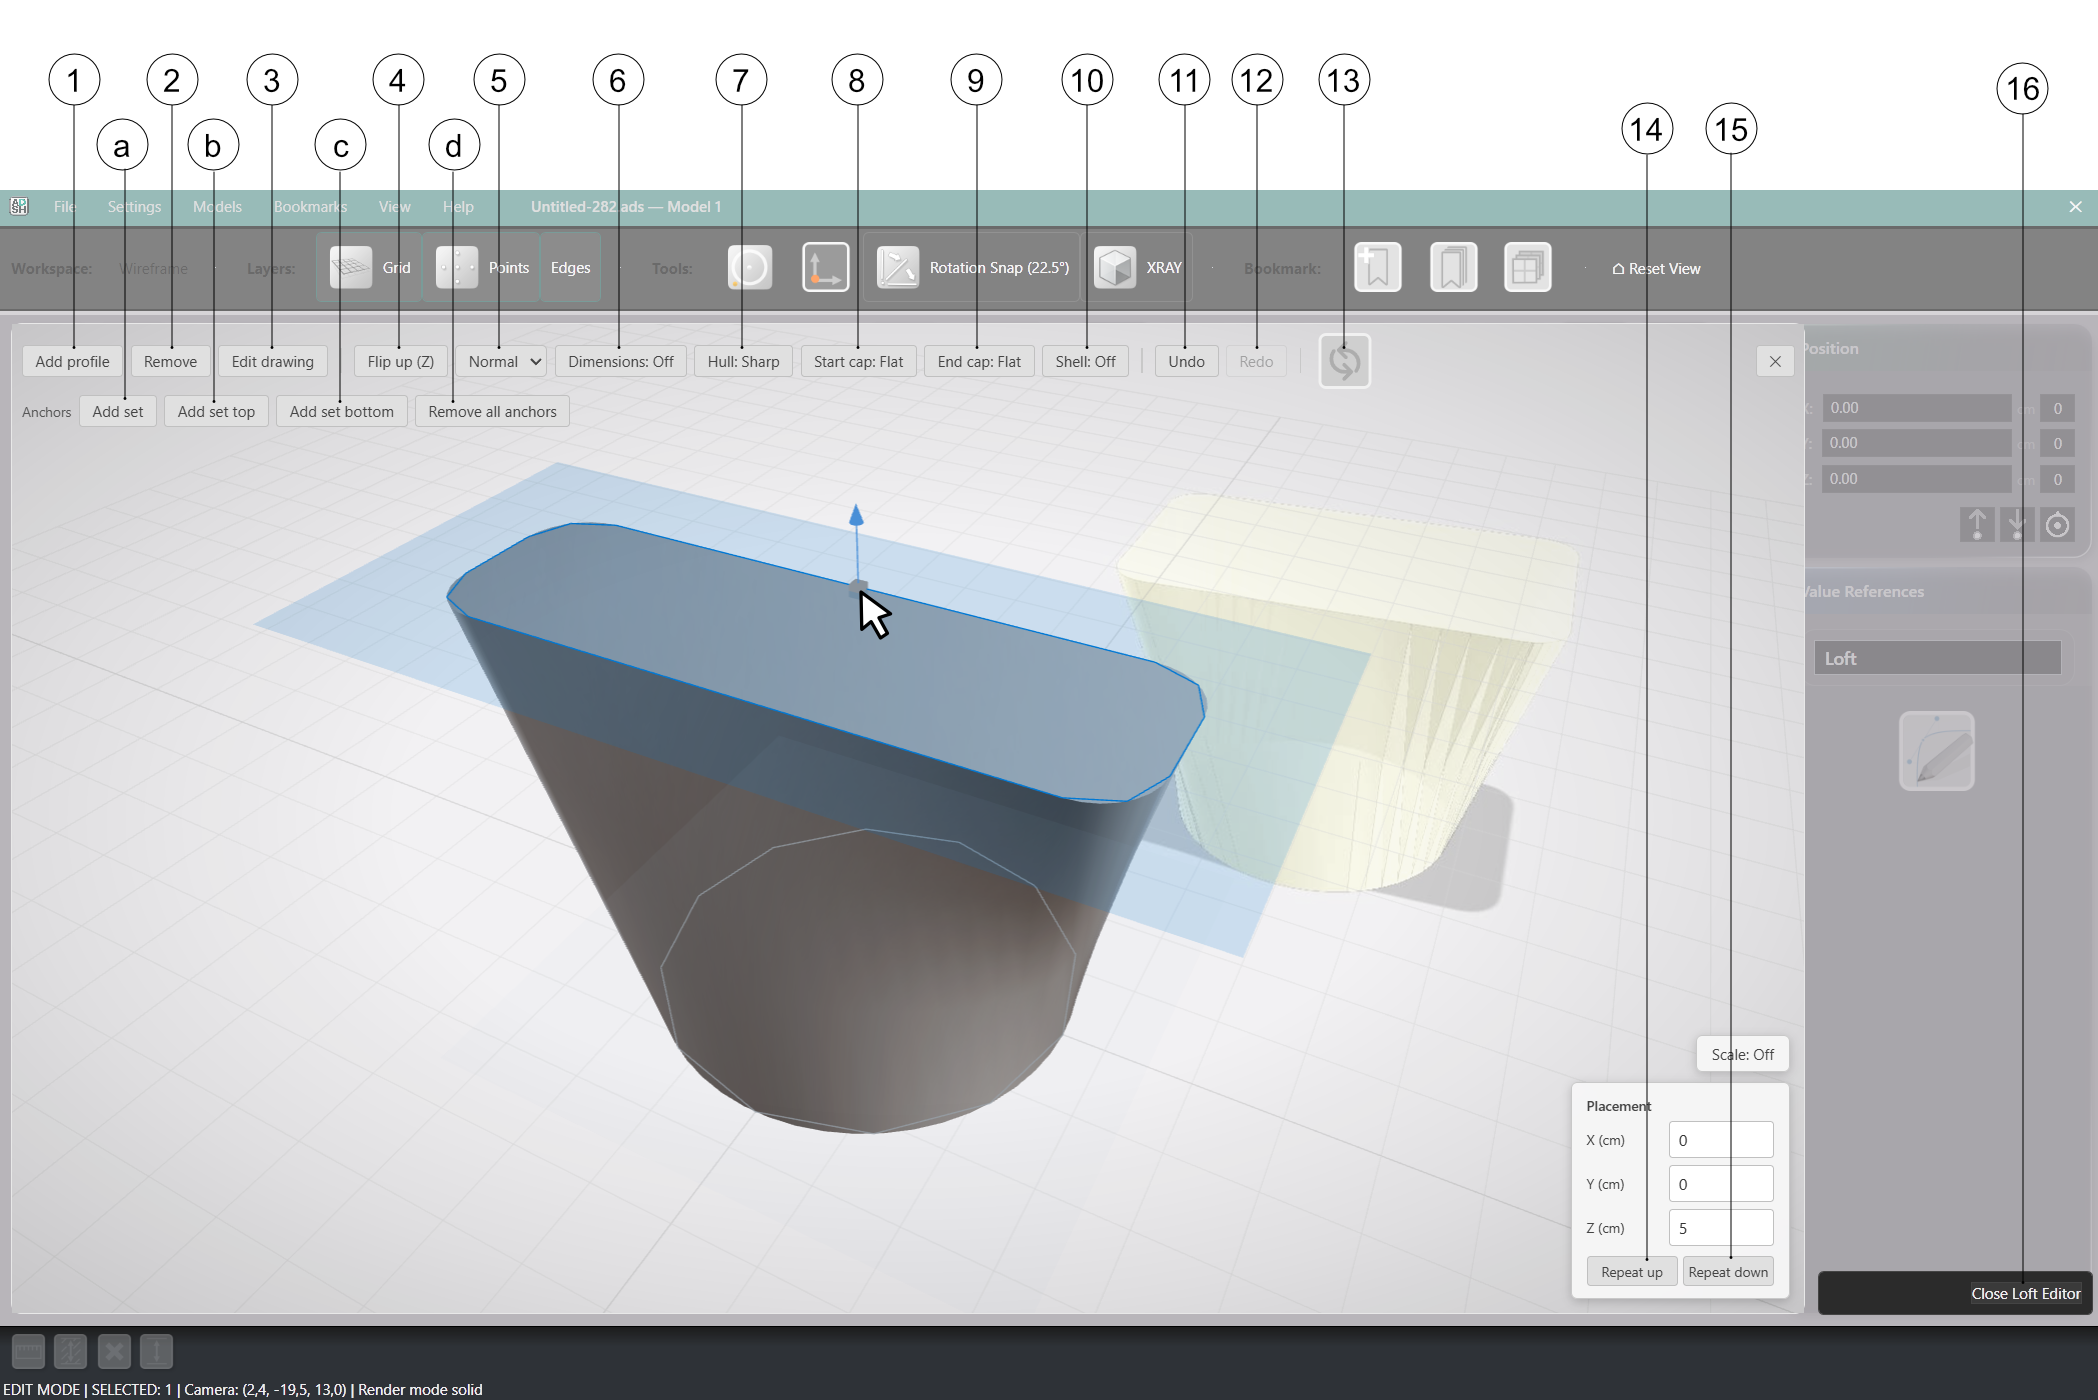
Toolbar
| Button | What it does | |
|---|---|---|
| 1 | Add profile | Adds a new profile to the loft |
| 2 | Remove | Removes the selected profile |
| 3 | Edit drawing | Opens the selected profile in the profile editor. Double-clicking a profile does the same |
| 4 | Flip up | Flips the view. The geometry does not change |
| 5 | Render style | Normal, Gray or Wireframe |
| 6 | Dimensions | Shows or hides dimensions |
| 7 | Hull | Smooth or Sharp transition between profiles |
| 8 | Start cap | Cap style at the lowest profile: Flat, Ball or Organic |
| 9 | End cap | Cap style at the highest profile: Flat, Ball or Organic |
| 10 | Shell | A solid loft, or a hollow shell with a defined wall thickness |
| 11 | Undo | Reverts the last edit in the loft editor |
| 12 | Redo | Restores the last undone edit |
| 13 | Update | Rebuilds the loft in the model without closing the editor |
| 14 | Repeat up | Duplicates the selected profile above itself |
| 15 | Repeat down | Duplicates the selected profile below itself |
| 16 | Close Loft Editor | Applies the loft and returns to the model |
The Anchors row (a to d) is covered on the Anchors page.
Positioning a Profile
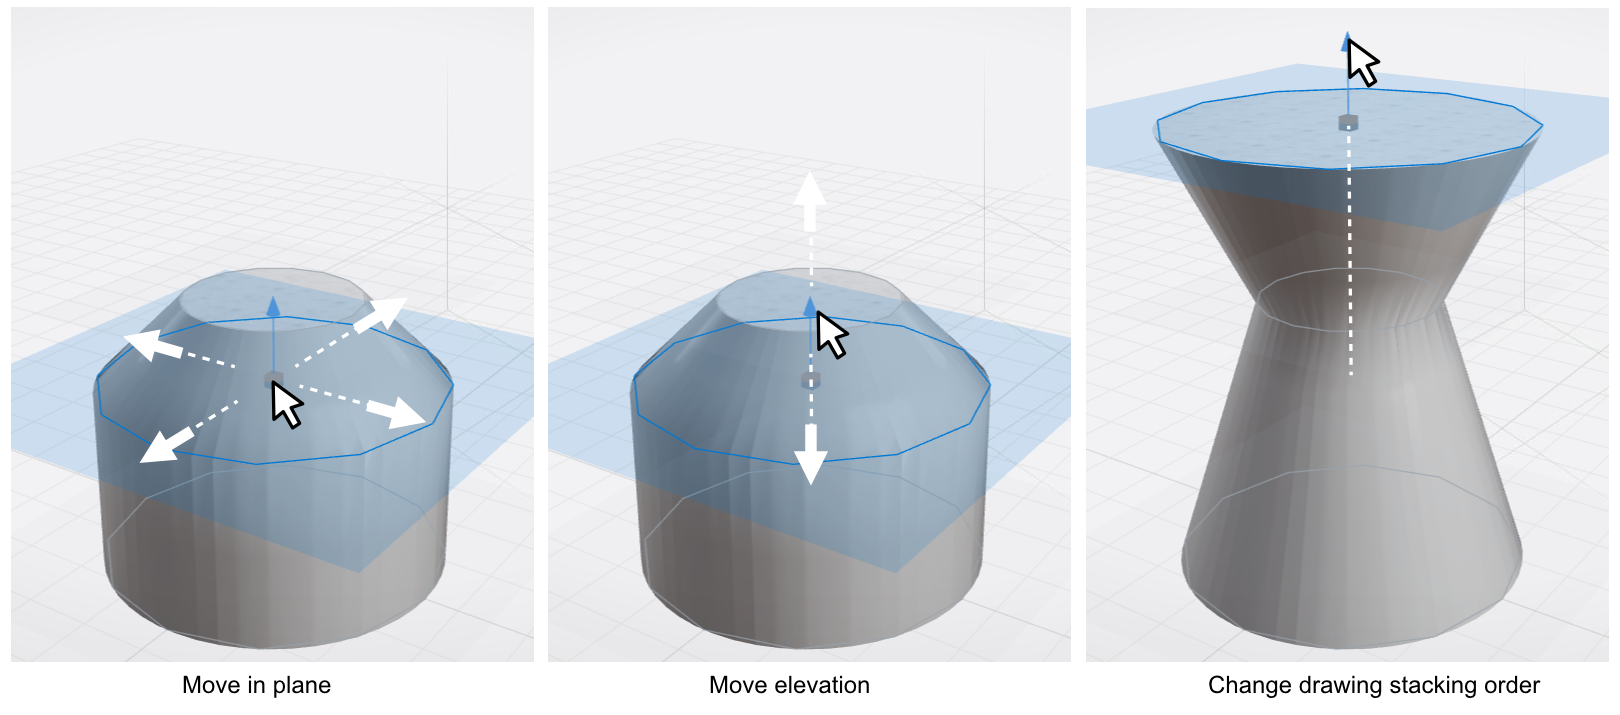
Click a profile to select it. The selected profile shows as a blue plane.
- Drag the grey cube to move the profile sideways in its plane.
- Drag the blue arrow to move the profile up or down along the axis.
- Type exact values into the Placement fields at the bottom right.
Profiles are ordered by height. When you drag a profile past another profile, the two swap places in the loft.
Scaling a Profile
Scaling a profile by dragging is off by default. Click Scale: Off next to the Placement fields to turn it on. A second grey cube then appears on the selected profile. Drag it to scale the profile. The drag rewrites the coordinates of the profile’s drawing.
Note: There is no scale value to adjust afterwards. Undo reverses the scaling. The setting resets when you close the loft editor.
Hull, Caps and Shell
Hull sets whether the surface blends smoothly between profiles or runs straight from one profile to the next.
Start cap and End cap set the cap style at the lowest and the highest profile: Flat, Ball or Organic.
Shell switches between a solid loft and a hollow shell. A shell has a defined wall thickness, which suits a container or a shoe upper. Type the thickness into the field next to the Shell button.
Applying Changes
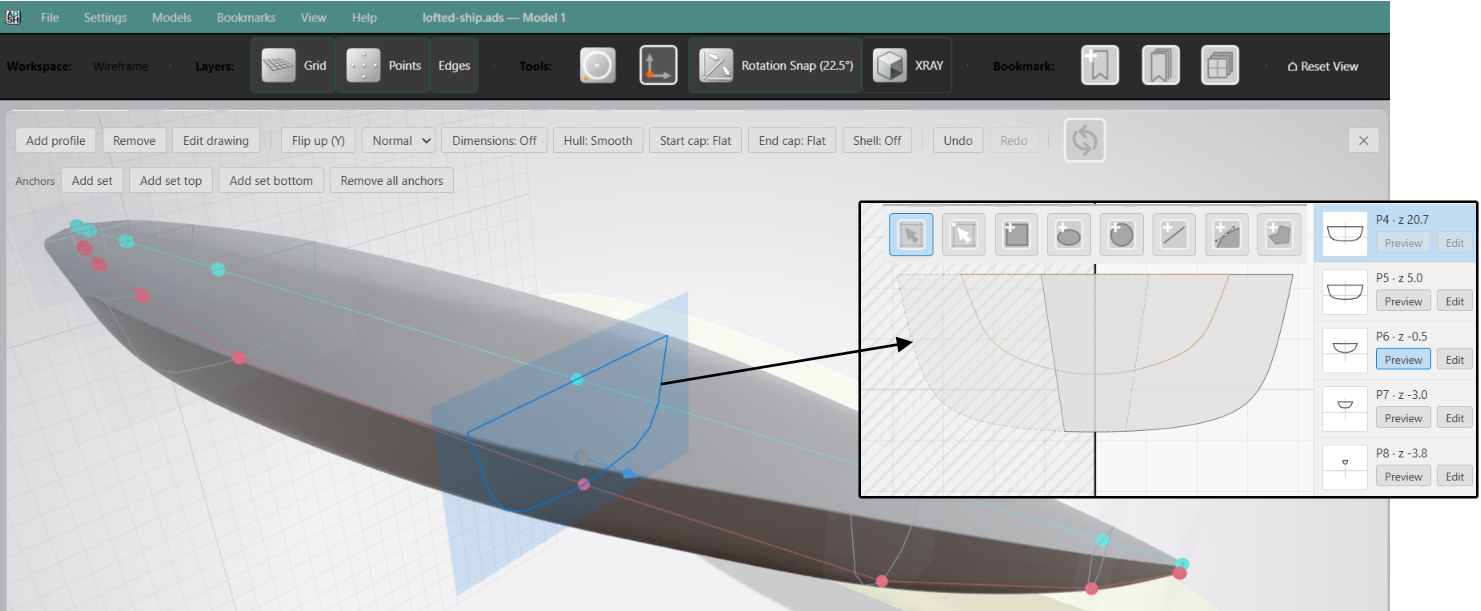
Click Update to rebuild the loft in the model while you keep editing. Click Close Loft Editor to apply the changes and return to the model.